How to handle multiple firebase projects from the same Ionic app
Do you have a separate environment for development, production, QA? Or do you test everything on the same Firebase application?
For the longest time, I used one project for everything, but then, it got traction, couple hundred people started using it, and every time something crashed because of my testing I got several emails asking what was going on.
At that point, I understood that I needed to separate things. With separate projects, you can safely test everything you need to check while making sure your production application stays stable.
Today, you’ll learn:
- How to set up multiple firebase projects for the same application.
- How to serve and test your app in each of the environments.
- How to deploy to a specific project.
Setting up multiple projects
This is the first part you’ll need to have ready, creating the actual projects, for that, go ahead and open the firebase console at console.firebase.google.com, and create the new projects you need.
For example, if you already have a project called “my awesome app”, go ahead and create my awesome app QA and my awesome app DEV.
That way, you’ll have a QA environment and a development environment.
NOTE: This is more related to the business than to the technical side, so you’re the best person to decide how many environments your app should have.
If you’re a ‘Company of One’, like me, then probably a new environment will work, since that way you get one for testing and one for your actual users.
If you’re a more prominent company and have a QA team, then you might need more environments, for example, at a more significant project I worked on we had: DEV, QA, PROD, and DEMO environments, so remember, it’s up to your use case.
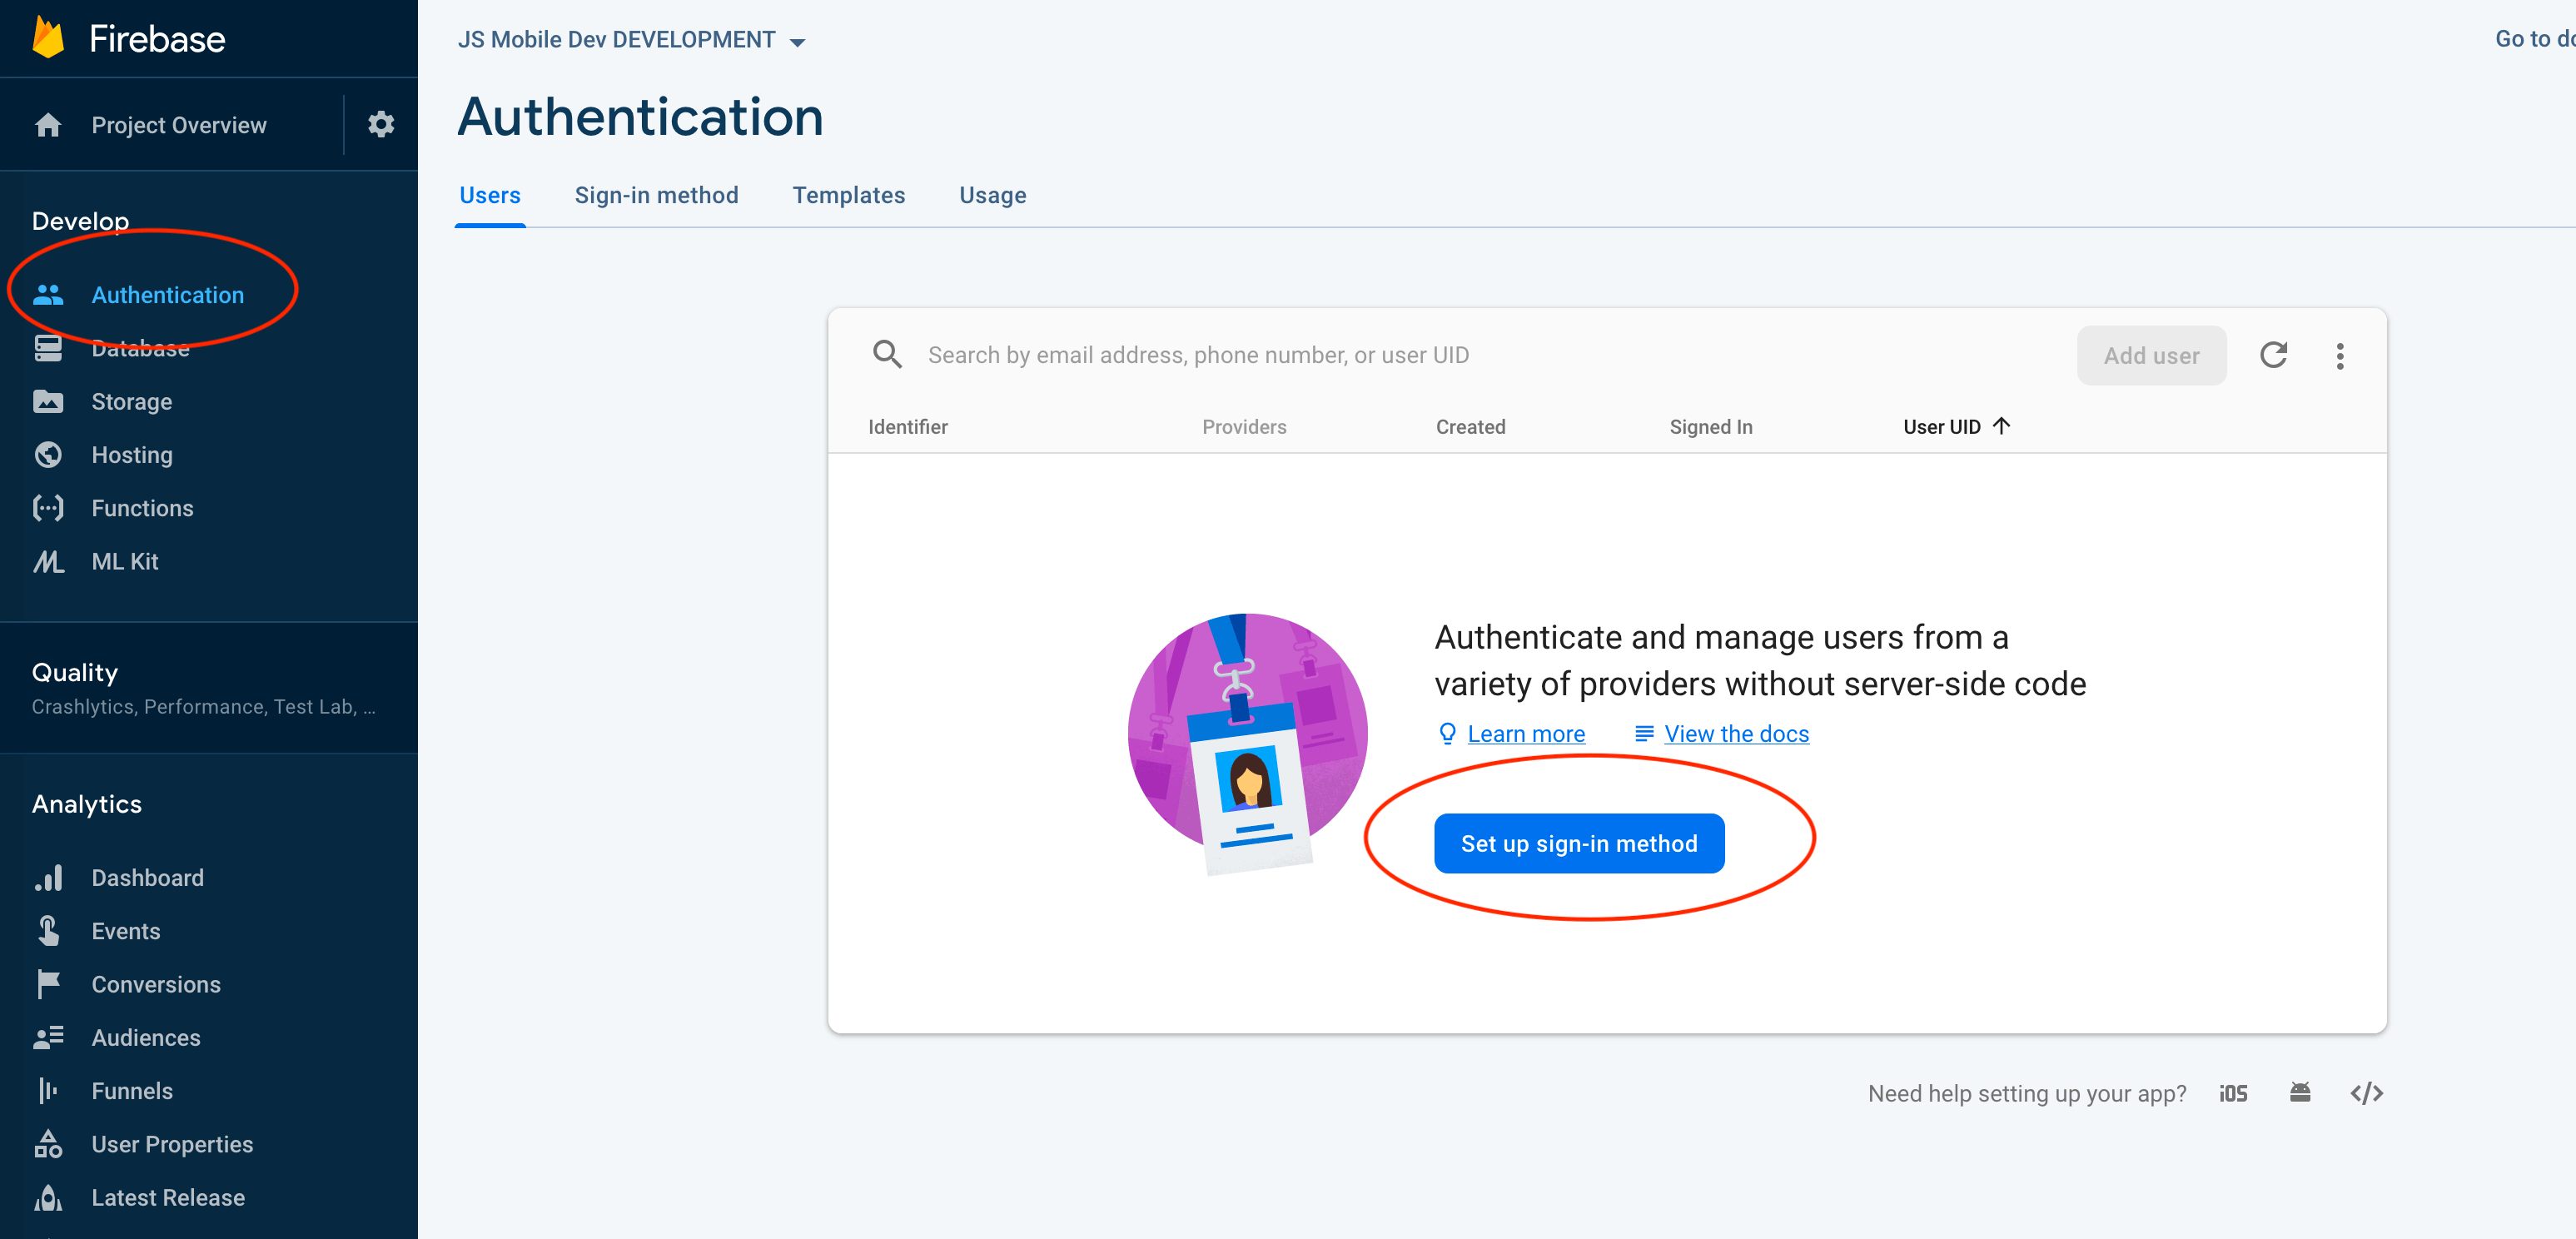
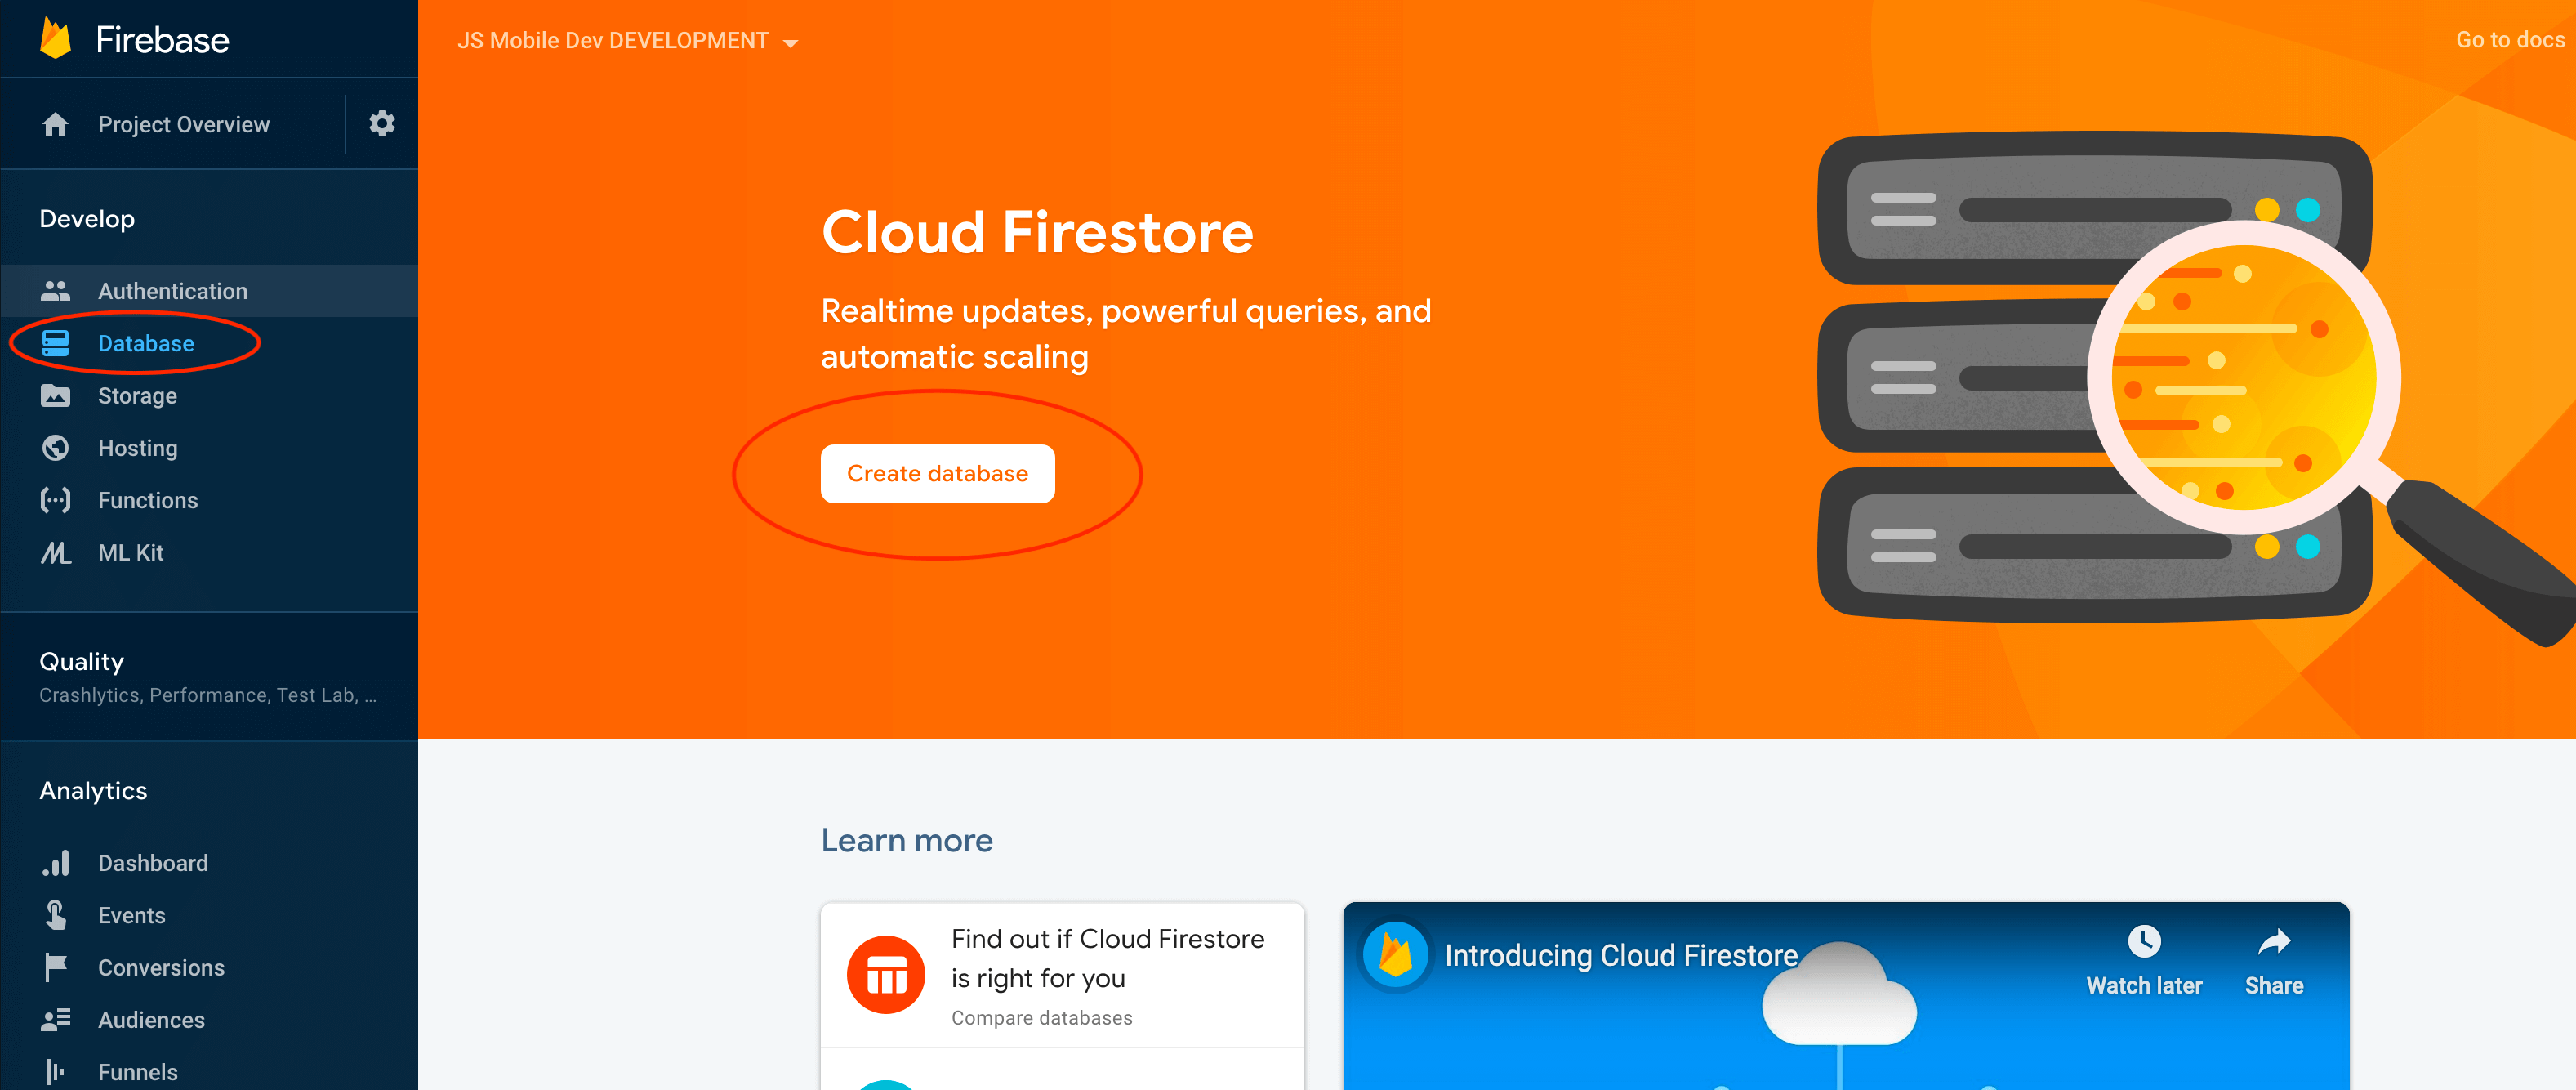
Once you have created the projects, go ahead and activate them, for most cases that means to create a new app, and go into the Database and Authentication tabs. Both create a new database and enable an authentication method, as shown in the pictures below.
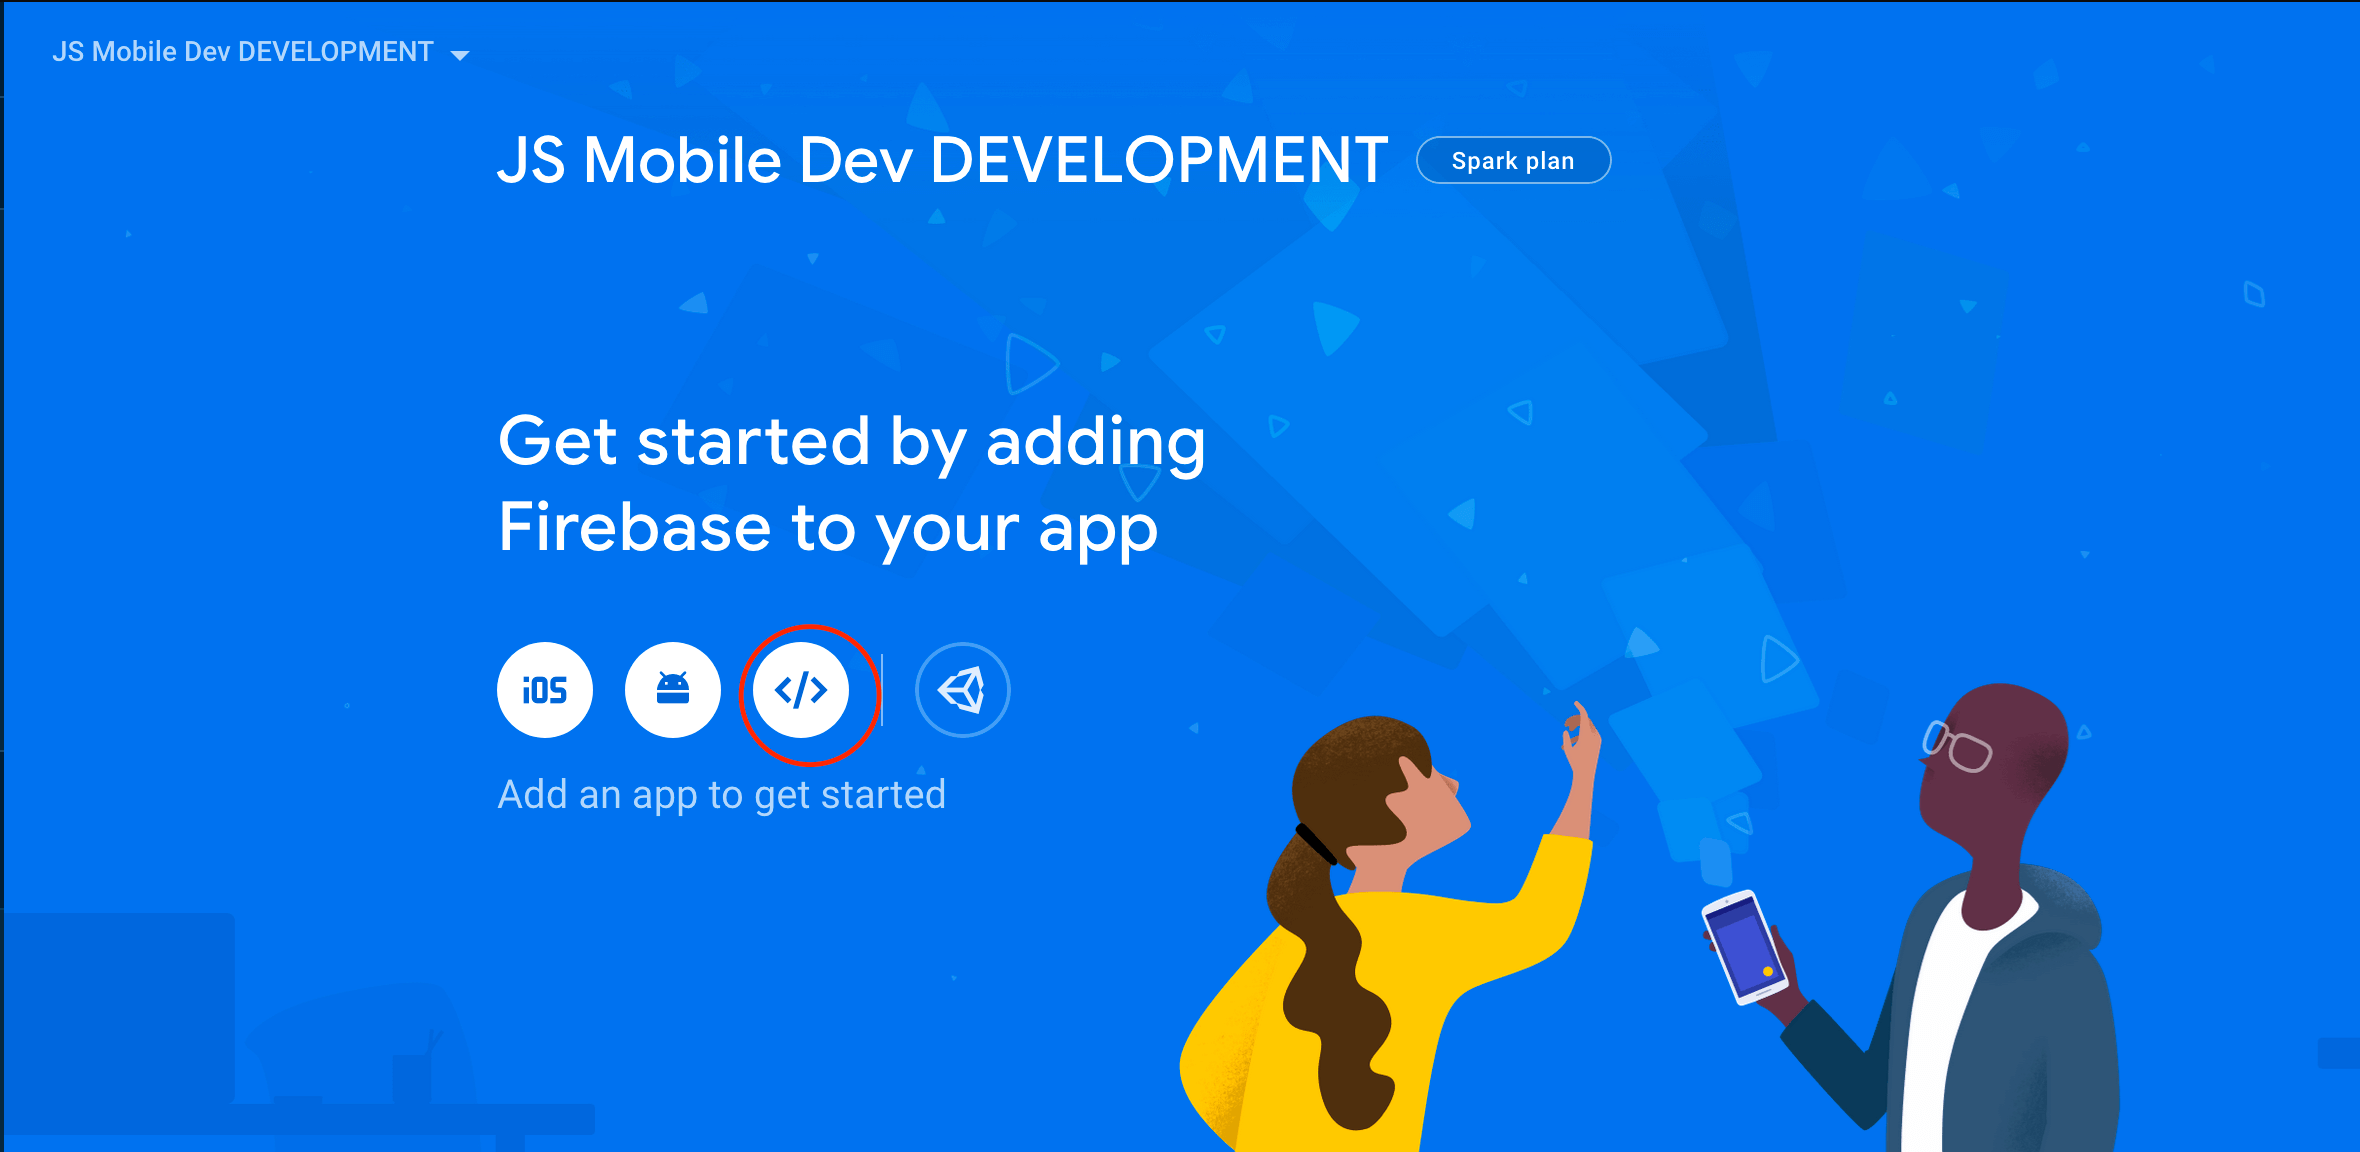
Now that your Firebase projects are created, we need to start preparing our application for it, the first thing we want is to add the appropriate credentials to each environment.
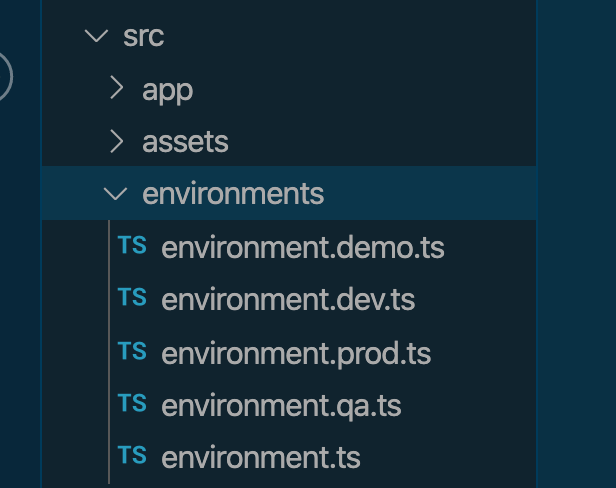
For that, let’s open our Ionic app, and navigate to the src/environments folder, you’ll create a
new environment file for each firebase project you created.
For example, in a previous app, it looked like this.
Each environment file should have a different set of Firebase credentials, such as:
export const environment = {
  production: false,
  firebase: {
    apiKey: '',
    authDomain: '',
    databaseURL: '',
    projectId: '',
    storageBucket: '',
    messagingSenderId: '',
    appId: '',
    measurementId: '',
  },
  name: 'Local Development Environment',
};
You can even add new variables, like, application name, and display it in the app, so you’ll have a visual representation of the environment you’re targetting.
Now that we have the files, our next step is to create configuration builds for each environment.
So, open your angular.json file, and look for architect > build > configuration.
Inside, you’ll find a configuration for production, and it looks like this:
"production": {
  "fileReplacements": [
    {
      "replace": "src/environments/environment.ts",
      "with": "src/environments/environment.prod.ts"
    }
  ],
  "optimization": true,
  "outputPath": "www",
  "outputHashing": "all",
  "sourceMap": false,
  "extractCss": true,
  "namedChunks": false,
  "aot": true,
  "extractLicenses": true,
  "vendorChunk": false,
  "buildOptimizer": true,
  "budgets": [
    {
      "type": "initial",
      "maximumWarning": "10mb",
      "maximumError": "20mb"
    }
  ],
  "serviceWorker": true,
  "ngswConfigPath": "ngsw-config.json"
}
Depending on the angular version you’re using, it can have more or fewer properties.
Right now, we only care about one, fileReplacements, this tells the angular build service that
whenever you try to do a production build, it needs to use the environment.prod.ts file instead of
the environment.ts
So, go ahead and copy the entire production configuration and copy it right next to it. In the end, it should look like this:
"production": {
  "fileReplacements": [
    {
      "replace": "src/environments/environment.ts",
      "with": "src/environments/environment.prod.ts"
    }
  ],
  "optimization": true,
  "outputPath": "www",
  "outputHashing": "all",
  "sourceMap": false,
  "extractCss": true,
  "namedChunks": false,
  "aot": true,
  "extractLicenses": true,
  "vendorChunk": false,
  "buildOptimizer": true,
  "budgets": [
    {
      "type": "initial",
      "maximumWarning": "10mb",
      "maximumError": "20mb"
    }
  ],
  "serviceWorker": true,
  "ngswConfigPath": "ngsw-config.json"
},
"production": {
  "fileReplacements": [
    {
      "replace": "src/environments/environment.ts",
      "with": "src/environments/environment.prod.ts"
    }
  ],
  "optimization": true,
  "outputPath": "www",
  "outputHashing": "all",
  "sourceMap": false,
  "extractCss": true,
  "namedChunks": false,
  "aot": true,
  "extractLicenses": true,
  "vendorChunk": false,
  "buildOptimizer": true,
  "budgets": [
    {
      "type": "initial",
      "maximumWarning": "10mb",
      "maximumError": "20mb"
    }
  ],
  "serviceWorker": true,
  "ngswConfigPath": "ngsw-config.json"
}
And now, let’s change the second production configuration to match our development environment, it should look like this:
"production": {
  "fileReplacements": [
    {
      "replace": "src/environments/environment.ts",
      "with": "src/environments/environment.prod.ts"
    }
  ],
  "optimization": true,
  "outputPath": "www",
  "outputHashing": "all",
  "sourceMap": false,
  "extractCss": true,
  "namedChunks": false,
  "aot": true,
  "extractLicenses": true,
  "vendorChunk": false,
  "buildOptimizer": true,
  "budgets": [
    {
      "type": "initial",
      "maximumWarning": "10mb",
      "maximumError": "20mb"
    }
  ],
  "serviceWorker": true,
  "ngswConfigPath": "ngsw-config.json"
},
"development": {
  "fileReplacements": [
    {
      "replace": "src/environments/environment.ts",
      "with": "src/environments/environment.dev.ts"
    }
  ],
  "optimization": true,
  "outputPath": "www-dev",
  "outputHashing": "all",
  "sourceMap": false,
  "extractCss": true,
  "namedChunks": false,
  "aot": true,
  "extractLicenses": true,
  "vendorChunk": false,
  "buildOptimizer": true,
  "budgets": [
    {
      "type": "initial",
      "maximumWarning": "10mb",
      "maximumError": "20mb"
    }
  ],
  "serviceWorker": true,
  "ngswConfigPath": "ngsw-config.json"
}
You’ll do that for every environment you created. That way, the angular compiler knows to replace those files when it’s creating a new build.
Now, every time you want to create a new build, you can use the terminal and the command:
ng build --configuration=development
Where you can pass the configuration name you created. That will give you a new build for every environment you’re using.
Using ionic/ng serve with different environments
One key thing of web development is being able to develop locally, now that you have multiple
environments, you can run your code locally with ionic serve or ng serve and point to any of the
environments you have.
For that, we’ll go to the angular.json file one more time, inside the architect object where you
found your production configurations, you’ll also find your serve configurations.
Go ahead and create new configurations for every environment, you need to point to the build configuration you created in the previous step.
So, if I want to create QA configuration you’ll do something like this:
"serve": {
  "builder": "@angular-devkit/build-angular:dev-server",
  "options": {
    "browserTarget": "app:build"
  },
  "configurations": {
    "production": {
      "browserTarget": "app:build:production"
    },
    "qa": {
      "browserTarget": "app:build:qa"
    }
  }
},
Remember, you need to have a build configuration for QA first.
That way, if you want to run QA locally, you can open your terminal and do:
ng serve --configuration=qa
Which will create a local server with all the configuration you have in the QA environment.
One thing I’d like to mention, this will take ALL the configurations, so AoT, buildOptimizer,
and anything else you have there.
If you don’t need all of this, you can create a new QA configuration named local-qa, where you only
copy the fileReplacement object and ignore everything else.
Deploy your application
For deployment, we need to make sure we’re always deploying to the right project. For that, we’ll create a few scripts.
First, we need to make sure we have access to the projects we created, so we need to use the Firebase CLI tool.
Install it if you haven’t already with:
npm install -g firebase-tools
And then, make sure you’re logged in with:
firebase login
It will open a new window where you can log in with your Google account.
Once you’re there, you can type:
firebase use
And it will show you a list of all of the firebase projects you have available in your account, so if you type:
firebase use myappId
The terminal will jump to that project, and your app will start using the new app, so if you do a
firebase deploy or something similar, it will point to that project.
This is dangerous, because, unintentionally, you can end up deploying something to the wrong project and create a mess for your users.
So, instead of manually doing that, we’re going to create scripts to handle deployment.
We’ll create those scripts in the package.json file, open it and it should look something similar
to this:
{
  "name": "Ionic app",
  "version": "0.0.1",
  "author": "Ionic Framework",
  "homepage": "https://ionicframework.com/",
  "scripts": {
    "ng": "ng",
    "start": "ng serve",
    "build": "ng build",
    "build:prod": "ng build --prod",
    "test": "ng test",
    "lint": "ng lint",
    "e2e": "ng e2e"
  },
  "private": true,
  "dependencies": {},
  "devDependencies": {},
  "description": "An Ionic project"
}
Inside the scripts object, we’ll start adding our deployment scripts. How do we know how many
scripts we need? Well, it will depend on your use case.
For example, you can have one script per environment, and deploy everything any time you want.
But for my case, it’s a bit different, I have Cloud Functions, and I don’t need to deploy Cloud Functions every time I make a change to my front end application.
So, in my case, I have three scripts per environment:
- One script deploys everything to firebase.
- One script deploys only hosting.
- One script deploys only cloud functions.
They would look like this:
{
  "name": "Ionic app",
  "version": "0.0.1",
  "author": "Ionic Framework",
  "homepage": "https://ionicframework.com/",
  "scripts": {
    "ng": "ng",
    "start": "ng serve",
    "build": "ng build",
    "build:prod": "ng build --prod",
    "test": "ng test",
    "lint": "ng lint",
    "e2e": "ng e2e",
    "deploy-dev:hosting": "firebase use myDevAppId && ng build --configuration=development && firebase deploy --only hosting",
    "deploy-dev:functions": "firebase use myDevAppId && firebase deploy --only functions",
    "deploy-dev": "firebase use myDevAppId && ng build --configuration=dev && firebase deploy"
  },
  "private": true,
  "dependencies": {},
  "devDependencies": {},
  "description": "An Ionic project"
}
Notice one thing, the first thing the deploy-dev script does is to make sure you’re deploying to
the right environment. It uses firebase use appId to point first to the environment you want.
If you don’t know your app IDs, you can type firebase use in the console and it will list them for
you.
In this case, the deploy-dev doesn’t care about anything, and it will deploy every Firebase API I
have initialized, so hosting, cloud functions, security rules, etc.
The other two scripts separate cloud functions and hosting, so you only deploy the one you need.
See how you could probably end up with different scripts; it all depends on what your application needs.
Now, an important thing to remember; these are the script you’ll use to deploy your app, you won’t use the firebase CLI tool directly anymore. Please, that’s important to remember.
Now, whenever you want to deploy your app, you first think about, what do I need to deploy, and then, open your terminal and run it like this:
npm run deploy-dev:hosting
Or
npm run deploy-dev:functions
It all depends on what it is that you need to deploy.
And that’s it, hope this helps you keep your projects better organized, and remember, if you have any questions I’m always one email away 😃.