The Full Guide on how to use the Firebase Emulator for the Web
Working locally, you can not only work faster (everything is in your machine), but also spend less money? That’s because the reads or writes to your local database don’t count against your quota, so you end up saving money 💸.
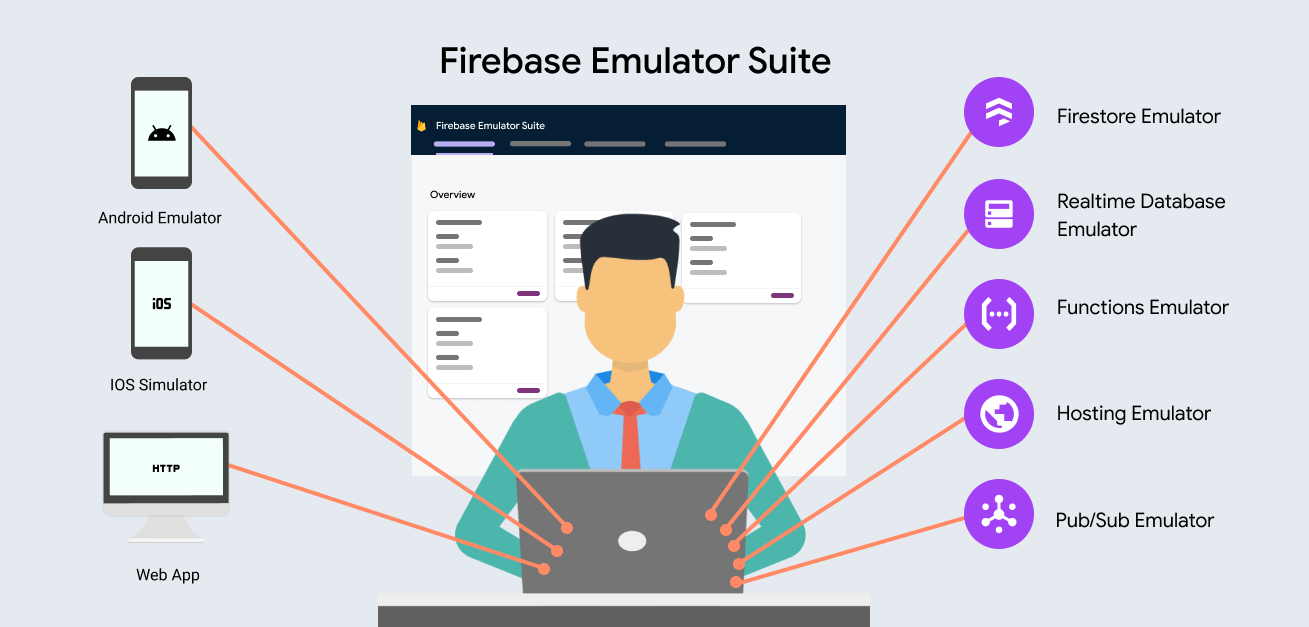
Today, we’ll go through the process of setting up the Firebase emulator in a way that you can use it for most of your app needs.
This guide is broken down into 3 parts.
-
First, we’ll go through the process of installing the emulator and the different APIs we’ll use, like, Authentication, Firestore, and Functions.
-
Second, we’ll cover the different types of cloud functions there are, how we call them, and how each type is handled differently by the emulator.
-
And third, we’ll talk about properly configuring the emulator for things like having starter data so that you don’t have to start it from scratch, or setting it up to only work in development mode.
Before we start
This will work for any app using @angular/fire (and to most extent using the regular JS SDK), so
you can follow this guide in parallel with any web app you have that uses Firebase.
If you take a closer look, @angular/fire is a wrapper on top of the JS SDK, most changes come down
to imports, for example, if you’re importing the things you need for the authentication emulator,
you’d do something like this for @angular/fire:
import { provideAuth, getAuth, connectAuthEmulator } from '@angular/fire/auth';
To get the functions from @angular/fire/auth. But if you’re using the regular JS SDK, it would
look like this:
import { getAuth, connectAuthEmulator } from 'firebase/auth';
Where you get things directly from firebase/auth.
This guide can be also found as a more dynamic video course at Firebase Emulator Course at EggHead
With that in mind, let’s get started!
Installing the Firebase Emulator
To install the Emulators for our app, we want to open the terminal, and navigate to our project’s root folder once we’re there, we can type:
firebase init emulators
This will start asking us to pick the Firebase project we’re using (if you already initialized other Firebase APIs, this is probably already done).
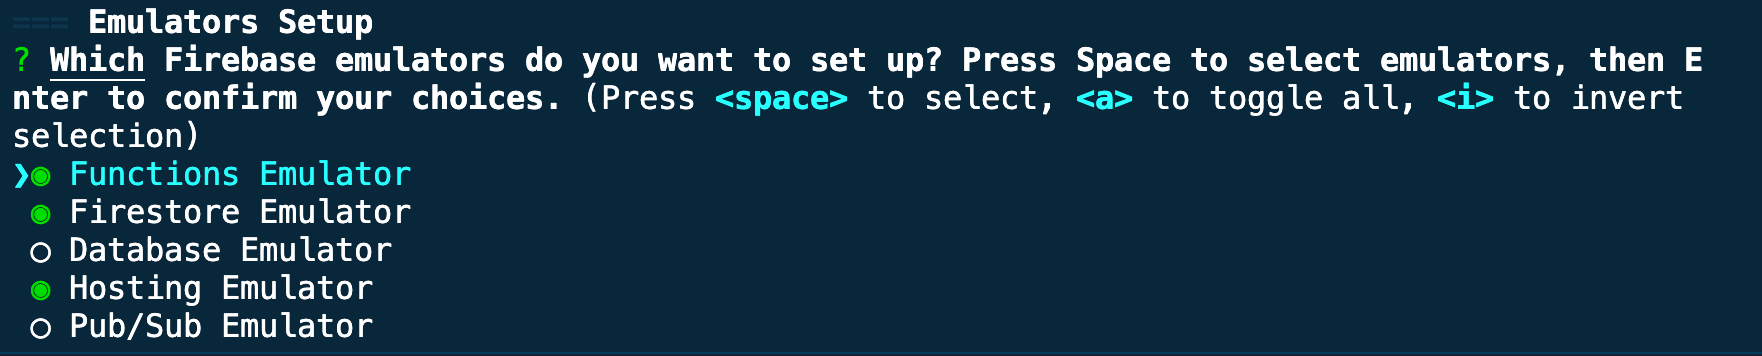
Then, tt will prompt for setup questions in the terminal. First, it will ask you to pick which emulators you want to use, in this guide, we’ll cover Authentication, Firestore, and Cloud Functions, but you can pick all the ones you need.
After you pick the emulators you want to use, then it will prompt you to pick the ports they’ll run on, unless you have a different preference, it’s ok to leave the defaults.
It will also ask you if you want to use the emulator’s UI, pick yes, because we’ll be using that to review and interact with our firebase application.

Now, to test that everything is set up, open the terminal again in your project’s root folder, and start the emulator using:
firebase emulators:start
It will start your emulators and show you the emulators' information in the terminal, as shown in the picture below.
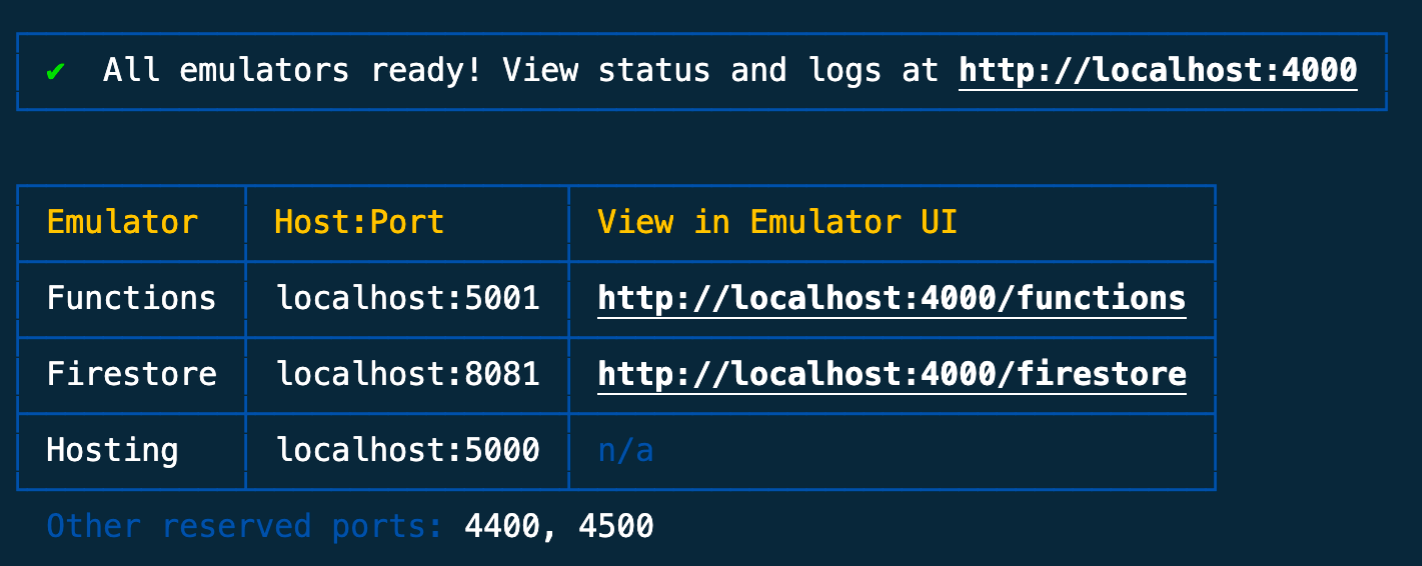
Once it’s running, you can open your browser and navigate to localhost:4000, remember, if you
chose a different port when initializing the emulator, then use it here.
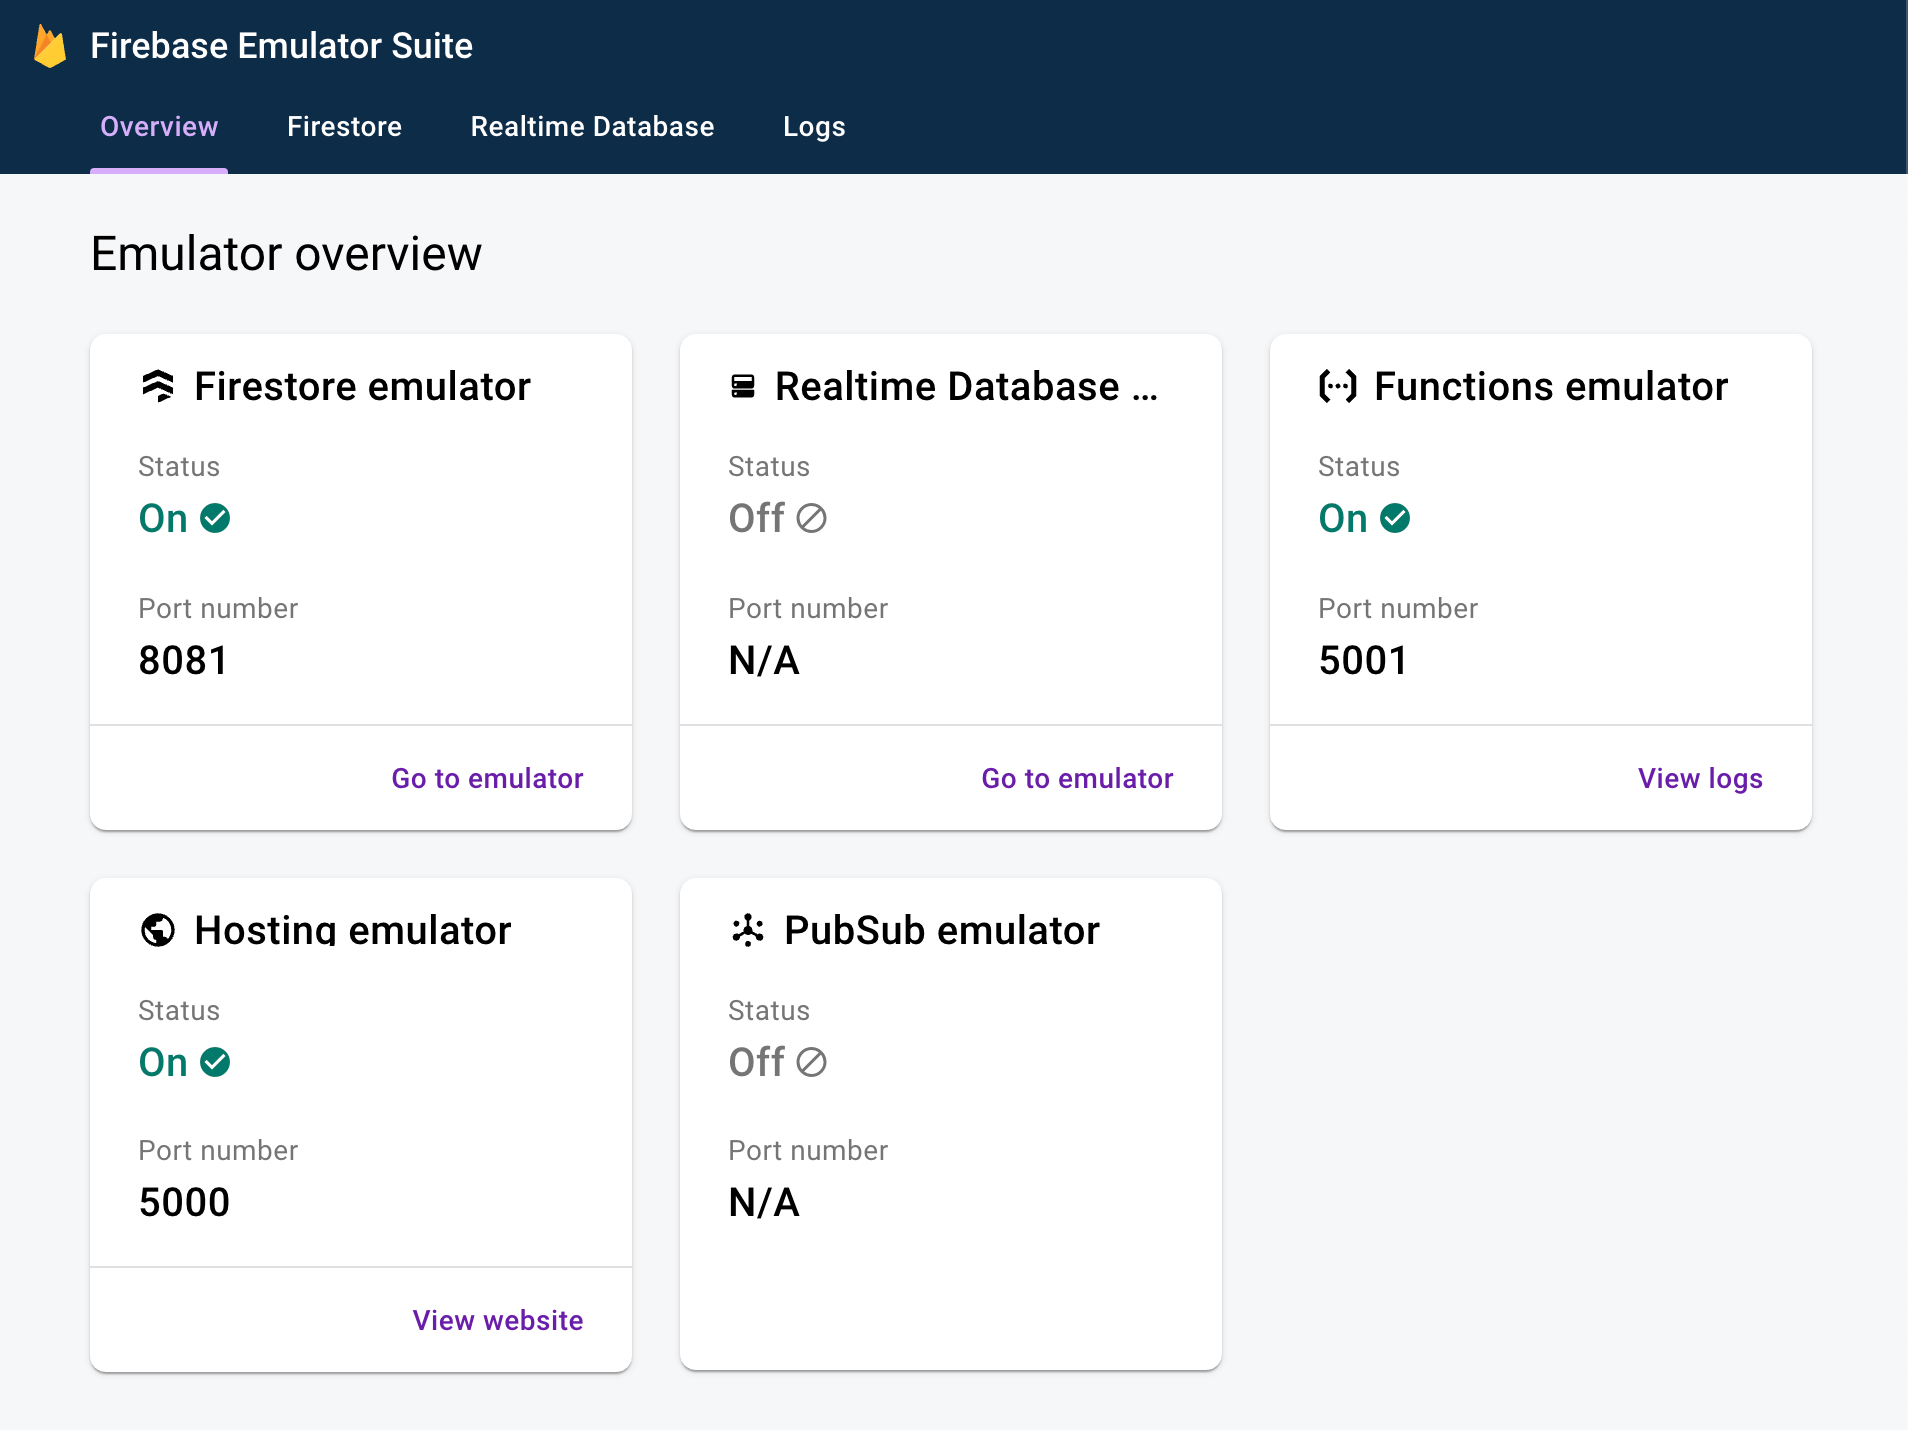
In the UI, you’ll be able to see a dashboard that shows you all your active emulators you have, you can click on any of them, and it will take you to the specific page for each one.
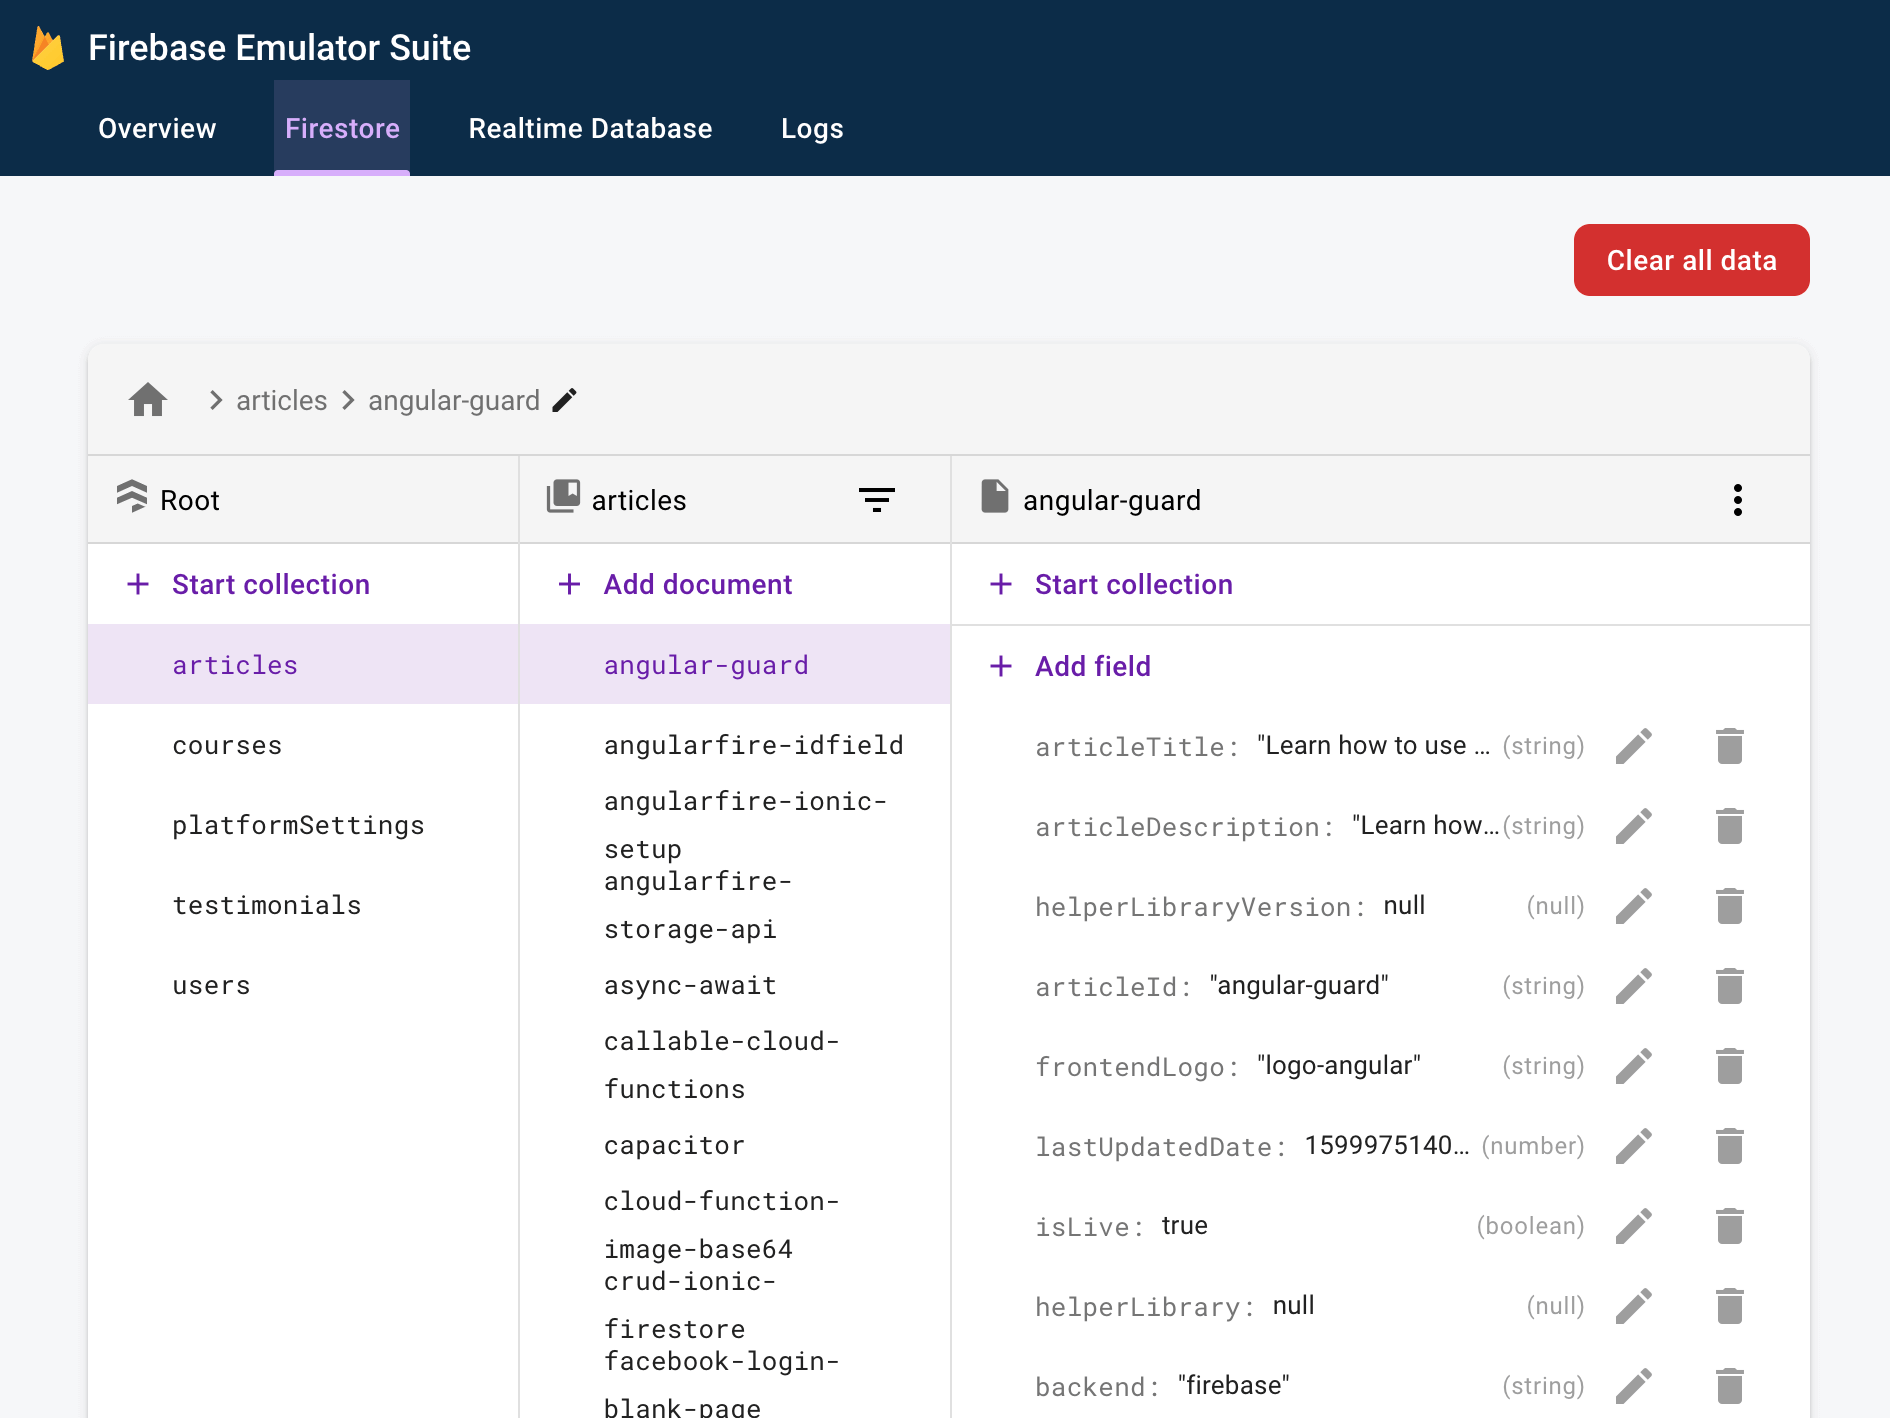
The Firestore emulator will show you a local instance of your Firestore DB as if you saw it in the Firebase Console (but it’s much faster than the online console).
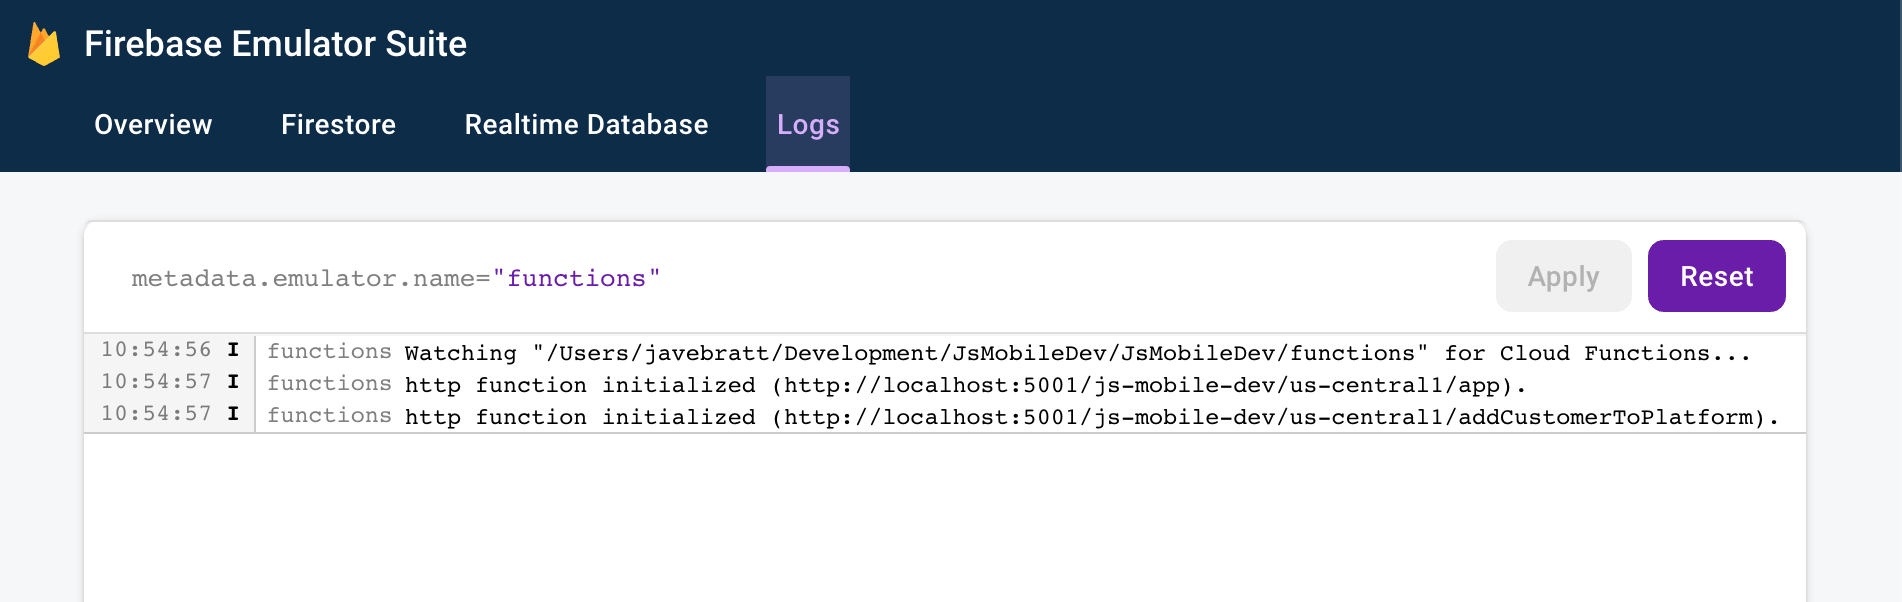
The Functions emulator will show the Cloud Functions logs.
Initializing the Firebase Authentication Emulator
We’re going to initialize the Authentication emulator, for that, you’ll go to where you have
initialized yout Firebase application, in my case, since I’m using Angular, this is in the
app.module.ts file.
For a normal Angular app with Firebase initialized it would look something like this:
import { NgModule } from '@angular/core';
import { BrowserModule } from '@angular/platform-browser';
import { RouteReuseStrategy } from '@angular/router';

import { AppComponent } from './app.component';
import { AppRoutingModule } from './app-routing.module';
import { initializeApp, provideFirebaseApp } from '@angular/fire/app';
import { provideAuth, getAuth } from '@angular/fire/auth';
import { provideFirestore, getFirestore } from '@angular/fire/firestore';
import { provideFunctions, getFunctions } from '@angular/fire/functions';
import { firebaseConfig } from './credentials';

@NgModule({
  declarations: [AppComponent],
  entryComponents: [],
  imports: [
    BrowserModule,
    AppRoutingModule,
    provideFirebaseApp(() => initializeApp(firebaseConfig)),
    provideAuth(() => {
      const auth = getAuth();
      return auth;
    }),
    provideFirestore(() => {
      const firestore = getFirestore();
      return firestore;
    }),
    provideFunctions(() => {
      const functions = getFunctions();
      return functions;
    }),
  ],
  providers: [],
  bootstrap: [AppComponent],
})
export class AppModule {}
First, we’ll look for where we’re importing from the Firebase Authentication package:
import { provideAuth, getAuth } from '@angular/fire/auth';
And we’ll add the connectAuthEmulator() function:
import { provideAuth, getAuth, connectAuthEmulator } from '@angular/fire/auth';
Then, we’ll initialize it in our provideAuth() import, it takes 2 parameters, the authentication
instance and the domain and port where authentication is running:
@NgModule({
  ...
  imports: [
    provideFirebaseApp(() => initializeApp(firebaseConfig)),
    provideAuth(() => {
      const auth = getAuth();
      connectAuthEmulator(auth, 'http://localhost:9099');
      return auth;
    }),
    ...
  ]
})
export class AppModule {}
If you don’t remember which port is running, you can go to firebase.json file and look there:
{
  "emulators": {
    "auth": {
      "port": 9099
    },
    "functions": {
      "port": 5001
    },
    "firestore": {
      "port": 8080
    },
    "ui": {
      "enabled": true
    }
  },
  ...
}
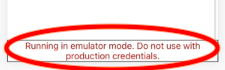
Then you can run both your app and the emulator, and in the bottom of the application’s UI, you’ll see a note that says Firebase is running in emulator mode.
All the calls you make to Firebase authentication will happen against the emulator now, which means that nothing will wor because you have no users there.
To fix that you can navigate to the emulators UI at localhost:4000 (you can check for the port in
your app) and open the Authentication tab, and add users like you do in the regular console.
Initializing the Firestore Emulator
We’re going to initialize the Firestore emulator, for that we’ll go to where we initialize our
firebase application, in our case the app.module.ts file.
There, we’ll look for the line where we import from Firestore, and add the
connectFirestoreEmulator() function:
import { provideFirestore, getFirestore, connectFirestoreEmulator } from '@angular/fire/firestore';
Then we’ll go into our NgModule imports array and modify the Firestore initialization to use the
emulator with the connectFirestoreEmulator() function, it takes 3 parameters: The firestore
instance, the domain it’s running on, and the port as a number:
provideFirestore(() => {
  const firestore = getFirestore();
  connectFirestoreEmulator(firestore, 'localhost', 8080);
  return firestore;
}),
Remember, you can always check what ports you’re using opening the firebase.json file.
Once that’s ready, make sure both the Firestore and Authentication emulator are running by opening the terminal and running:
firebase emulators:start
Now the calls your app makes to Authentication or to Firestore will both talk to the emulator instead of the online database.
Emulating Firebase Cloud Functions
Before we go into detail about how to use the Functions emulator, we need to understand something, there are different types of Cloud Functions, and using the emulator with each type of those functions will be a bit different.
We’ll cover 3 different type of Cloud Functions:
HTTP functions, these are your regular nodejs API endpoints, you call them, you get request and
response objects, and you use them as any express application would.
export const helloWorld = functions.https.onRequest((request, response) => {
  response.set('Access-Control-Allow-Origin', '*');
  response.send({ message: 'Hello from Firebase emulator!' });
});
Callable Functions, which are wrappers on top of HTTP functions, these are great to use in combination with the Firebase Client SDKs, because they handle all the configuration and authentication portions for you, and you can focus on the business logic.
export const sayHello = functions.https.onCall((data, context) => {
  return { message: 'Hello from the emulator' };
});
And Function Triggers, these are functions that respond to changes in our app, for example for Firestore we can have a function that triggers every time there’s a change in the database.
export const newFunctionCreated = functions.firestore
  .document('functions/{functionId}')
  .onCreate((snap, context) => {
    const functionId: string = snap.id;
    const functionBody = snap.data();

    console.log(functionId);
    console.log(functionBody.name);
    return;
  });
When to use Callable vs HTTP functions
Both of them create an HTTP endpoint you can call, the big difference is that the onRequest
follows more the traditional express endpoint structure and behavior.
And the onCall is a special wrapper on top of that, it lets you use the Firebase SDK from the
client side that handles authentication state of the user without you having to send cookies or
tokens.
They both work, as a general guideline I use onRequest when Im talking server-to-server and use
the onCall when calling those functions from my UI, that way I don’t have to handle JWT or cookies
:)
Using HTTP functions with the Emulator
First you need to make sure you have Firebase Cloud Functions initialized in your project, if not, you can open the terminal and type:
firebase init functions
Once you’re sure you have them there, you can create a new HTTP function, for example:
export const helloWorld = functions.https.onRequest((request, response) => {
  response.set('Access-Control-Allow-Origin', '*');
  response.send({ message: 'Hello from Firebase emulator!' });
});
Or you can use any of the functions that you have there if you already have some.
To run this on the emulator, we need to make sure we build them first, for that, you’ll navigate
into the functions folder and type:
npm run build
Then, you can navigate back to your project’s root folder and type:
firebase emulators:start
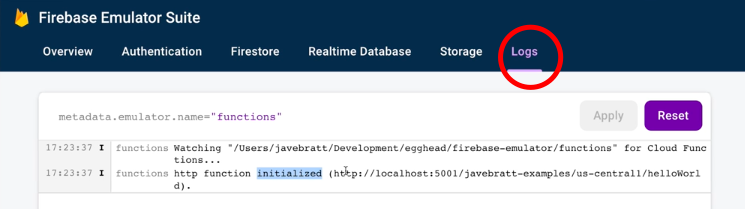
Then you can navigate to the emulator’s UI and in the logs you’ll be able to see your deployed
functions. Each function will have the URL you can use to call them, in our case
http://localhost:5001/javebratt-examples/us-central1/helloWorld.
You can use that URL to test the function from wherever you want, you can use a client like Postman
or Insomnia. Or you can quickly open the terminal and test it with curl
curl http://localhost:5001/javebratt-examples/us-central1/helloWorld
Using Callable functions with the Emulator
To test our callable functions from the emulator we can make sure we build the functions as seen before, and then run the emulator again.
If you don’t have any at the moment, you can add a short function like this:
export const sayHello = functions.https.onCall((data, context) => {
  return { message: 'Hello from the emulator' };
});
It will return a data object with a message property when called.
Now, we need to work a bit on the UI so that we can call this function, first, let’s initialize the
Functions emulator, for that, we’re going back to the app.module.ts file (or wherever you’re
initializing Firebase) and import the connectFunctionsEmulator function:
import { provideFunctions, getFunctions, connectFunctionsEmulator } from '@angular/fire/functions';
Once that’s imported, we’ll initialize it in the imports array:
provideFunctions(() => {
  const functions = getFunctions();
  connectFunctionsEmulator(functions, 'localhost', 5001);
  return functions;
}),
It takes 3 parameters, the functions instance, the domain the run on, and the port as a number.
Remember, you can always check the ports in the firebase.json file.
Now in order to test this, we need to have the Firebase SDK call this function from the client application, for that, I will navigate to a test component that looks like a plain default angular cli generated component:
import { Component } from '@angular/core';

@Component({
  selector: 'app-authentication',
  templateUrl: './authentication.page.html',
  styleUrls: ['./authentication.page.scss'],
})
export class AuthenticationPage {
  constructor() {}
}
First, we’ll import what we need from the functions package, and inject the functions instance into the constructor:
import { Component } from '@angular/core';
import { Functions, httpsCallable } from '@angular/fire/functions';

@Component({
  selector: 'app-authentication',
  templateUrl: './authentication.page.html',
  styleUrls: ['./authentication.page.scss'],
})
export class AuthenticationPage {
  constructor(private readonly functions: Functions) {}
}
After all of that is done, we’ll create a function in the component, let’s call it
sayHelloFunction(), and it will initialize the function call:
sayHelloToFunction() {
  const sayHello = httpsCallable(this.functions, 'sayHello');
}
And then we can wait for the response:
sayHelloToFunction() {
  const sayHello = httpsCallable(this.functions, 'sayHello');

  sayHello().then((result) => {
    console.log(result);
  });
}
Now whenever you call the sayHelloToFunction() function it will call the Cloud Function and bring
back the response, and since we have the emulator running, it will call the local version of the
function.
Using Firestore Trigger functions with the Emulator
Luckily, these are the simplest type of functions we can set up to work with the emulator because there’s no real setup involved.
For example, let’s say you have this Firestore trigger function:
export const newFunctionCreated = functions.firestore
  .document('functions/{functionId}')
  .onCreate((snap, context) => {
    const functionId: string = snap.id;
    const functionBody = snap.data();

    console.log(functionId);
    console.log(functionBody.name);
    return;
  });
The only thing you need to do, to run this locally is to make sure BOTH the Firestore emulator and the Functions emulators are running, if they both are running then whatever changes you make in your local DB will trigger the local function.
NOTE: Remember, you need to build the functions whenever you create them or when you update them for the changes to be available in the emulator.
Configuring the Emulator
Right now you have the emulator up and running for usage, it will cover most of your needs, but there are still a few things we can do to make things work 100%
Only run the emulator while on development
If you go ahead and deploy your application, you’ll notice that even in the deployed version, you have the emulator notice, and the app will malfunction trying to talk to the emulator instead of the online firebase application.
For this, we need to make sure the emulator only runs while we’re on development, there are several
ways to accomplish this, but in theory, what you need to do is to make sure that the
connectSomethingEmulator() functions, only run in your deployed versions.
For this, we can take advantage of Angular’s environment files, and use the environment files, for
example you can open the environment.ts file, it looks like this:
export const environment = {
  production: false,
};
We can use that production variable and only run our emulators when it’s false, for this, we can go
back to our app.module.ts file, it should look like this:
import { NgModule } from '@angular/core';
import { BrowserModule } from '@angular/platform-browser';
import { RouteReuseStrategy } from '@angular/router';

import { AppComponent } from './app.component';
import { AppRoutingModule } from './app-routing.module';
import { initializeApp, provideFirebaseApp } from '@angular/fire/app';
import { provideAuth, getAuth } from '@angular/fire/auth';
import { provideFirestore, getFirestore } from '@angular/fire/firestore';
import { provideFunctions, getFunctions } from '@angular/fire/functions';
import { firebaseConfig } from './credentials';

@NgModule({
  declarations: [AppComponent],
  entryComponents: [],
  imports: [
    BrowserModule,
    AppRoutingModule,
    provideFirebaseApp(() => initializeApp(firebaseConfig)),
    provideAuth(() => {
      const auth = getAuth();
      return auth;
    }),
    provideFirestore(() => {
      const firestore = getFirestore();
      return firestore;
    }),
    provideFunctions(() => {
      const functions = getFunctions();
      return functions;
    }),
  ],
  providers: [],
  bootstrap: [AppComponent],
})
export class AppModule {}
We can then import the environment file:
import { environment } from '../environments/environment';
And use that to conditionally add the emulators:
@NgModule({
  declarations: [AppComponent],
  entryComponents: [],
  imports: [
    BrowserModule,
    IonicModule.forRoot(),
    AppRoutingModule,
    HttpClientModule,
    provideFirebaseApp(() => initializeApp(firebaseConfig)),
    provideAuth(() => {
      const auth = getAuth();
      if (!environment.production) {
        connectAuthEmulator(auth, 'http://localhost:9099');
      }
      return auth;
    }),
    provideFirestore(() => {
      const firestore = getFirestore();
      if (!environment.production) {
        connectFirestoreEmulator(firestore, 'localhost', 8080);
      }
      return firestore;
    }),
    provideFunctions(() => {
      const functions = getFunctions();
      if (!environment.production) {
        connectFunctionsEmulator(functions, 'localhost', 5001);
      }
      return functions;
    }),
  ],
  providers: [{ provide: RouteReuseStrategy, useClass: IonicRouteStrategy }],
  bootstrap: [AppComponent],
})
export class AppModule {}
There are even more complex solutions where you can initialize the emulators in different files and use Angular’s build process to make sure they never make it to the build if you’re running on production.
Importing seed data
Once you added all the data to Firestore if you stop the emulator and start it again, it will start empty, so you’d have to run that set of commands every time.
Luckily, Firebase does have an option to back up our emulator, with the emulator running, and all the data already in Firestore, open a separate window and type the command:
firebase emulators:export ./emulators.backup
It will create a folder called /emulators.backup in our project (you can change the name to
whatever you want), where all the data lives.
And once that’s ready, whenever you’re going to start the emulators, you’re going to do it with this command:
firebase emulators:start --import=./emulators.backup
Changing the name of the file to whatever you used in the export.
That’s it. Now you have a fully functional development environment that will let you both work faster and save money.
Do let me know if this was helpful or if there’s something missing you’d like to know!