Resize your images without writing code with Firebase Extensions
Image resizing is a common feature today, maybe you’re dealing with user-uploaded images, or want to upload images in bulk without having to manually resize them all.
Today you’ll learn how to use a Firebase Extension that will do that for you.
If you don’t know what extensions are, they’re pre-made Cloud Functions created by the Firebase team (and their partners, and most recently, community.) that have specific features you can use.
You can see the full list of available extensions at the Firebase Official Extension List.
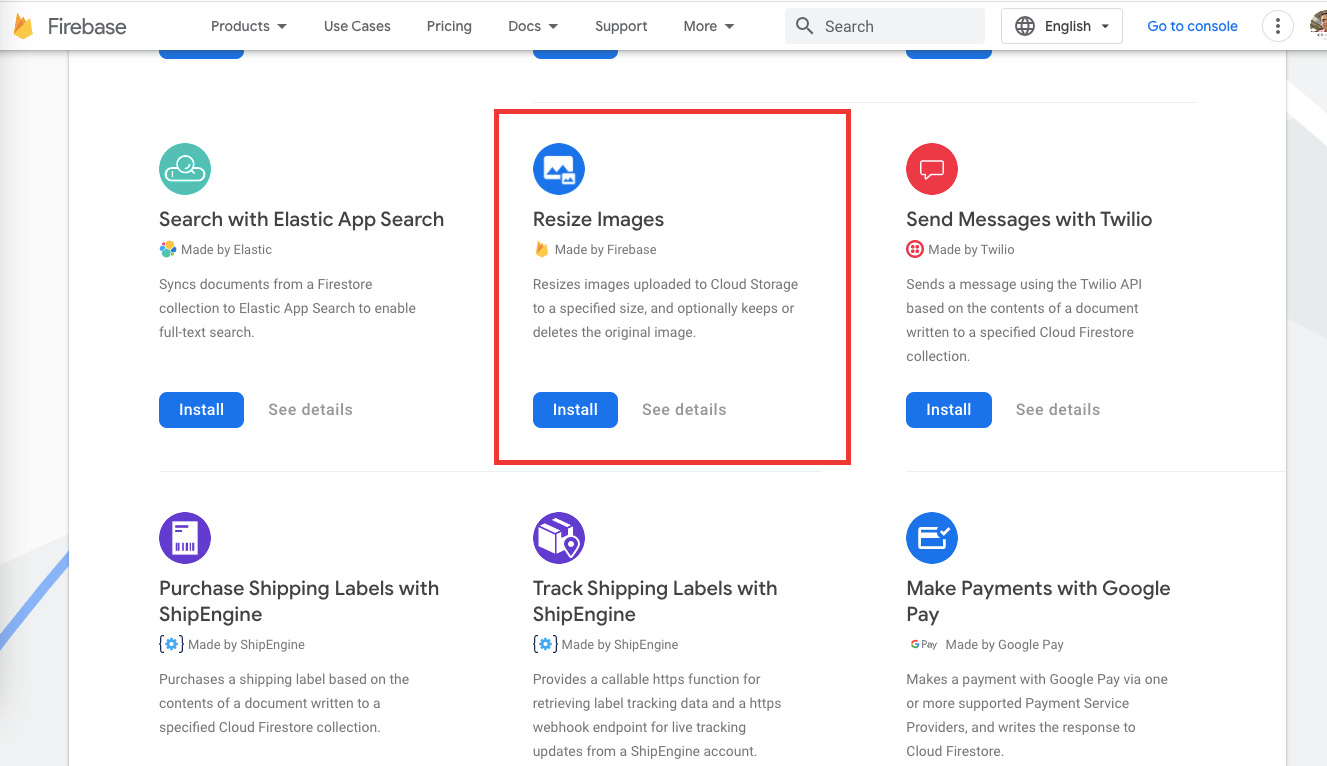
Today we’ll focus on the Resize Images extension created by the Firebase team.
It will let you add some configuration to it, and create a Cloud Function for you that will listen on your Cloud Storage bucket for new uploaded images in the path(s) you specify, and then, create a new image based on that with the size that you want.
You could use this to resize your images and delete the originals, or to create the resized versions and keep the originals, kind of like creating thumbnails.
Installing the extension
To install this extension, you can navigate to the list of extensions and pick Resize Images or you can navigate directly to the extension page.
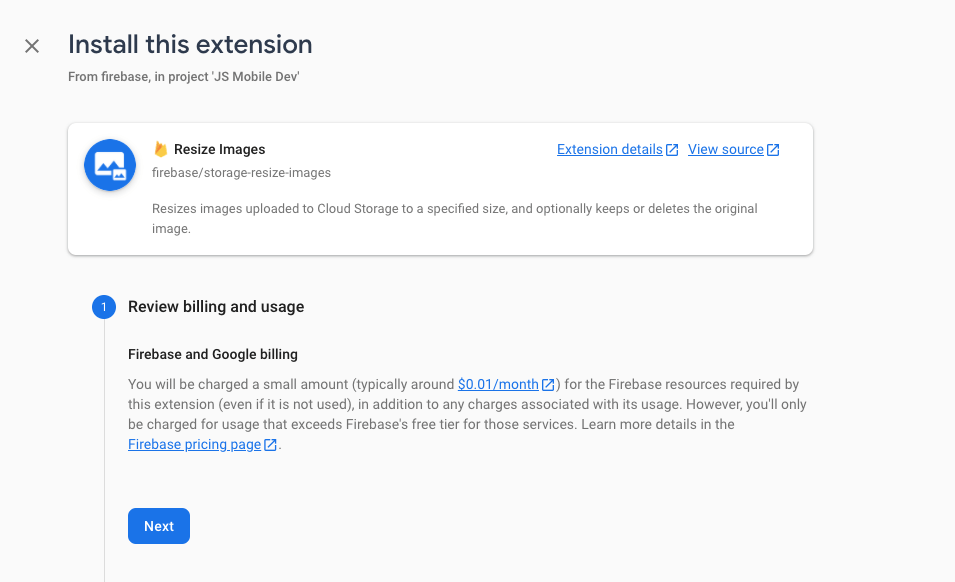
Once you’re there, click on Install Extension, it will take you to the list of your projects, there you can pick the project you want to use for this extension. (You’ll need to pick a project that has billing enabled, extensions won’t work on the free plan)

Once you choose your project, it will move you to the configuration section, first, you’ll review billing, and it will try to give you some estimates on how billing will work for this extension.
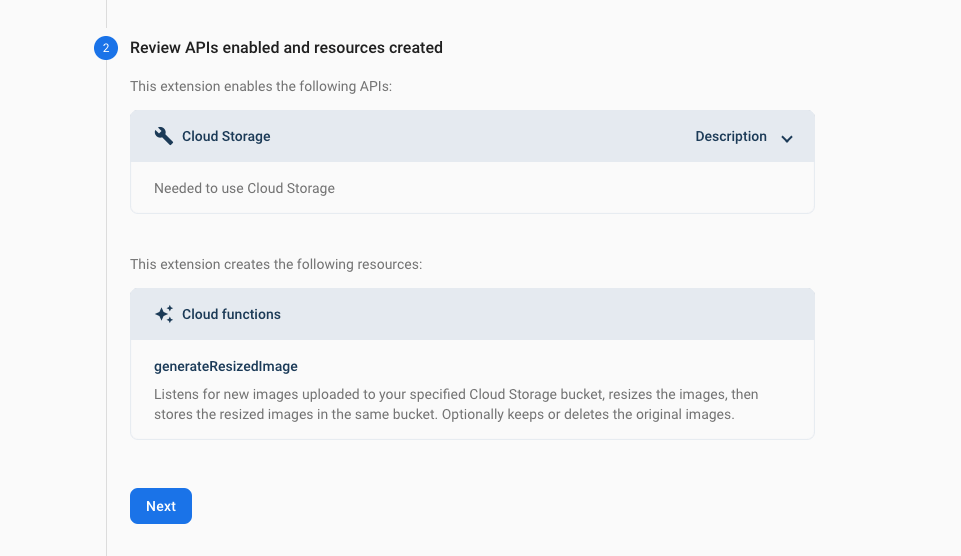
Then, you can review the APIs it enables and the resources it creates, in our case, it makes sure you have Cloud Storage enabled, and it also creates a Cloud Function called generateResizedImage.
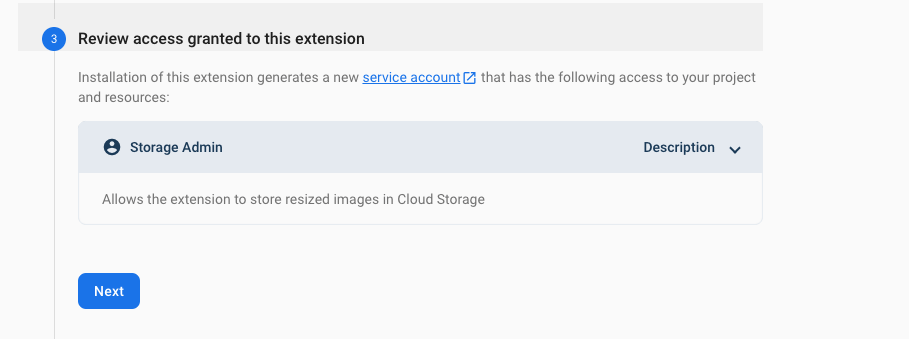
After that we need to review the access, this extensions asks for Storage Admin access.
And after that, we start setting the configuration for how the extension will work.
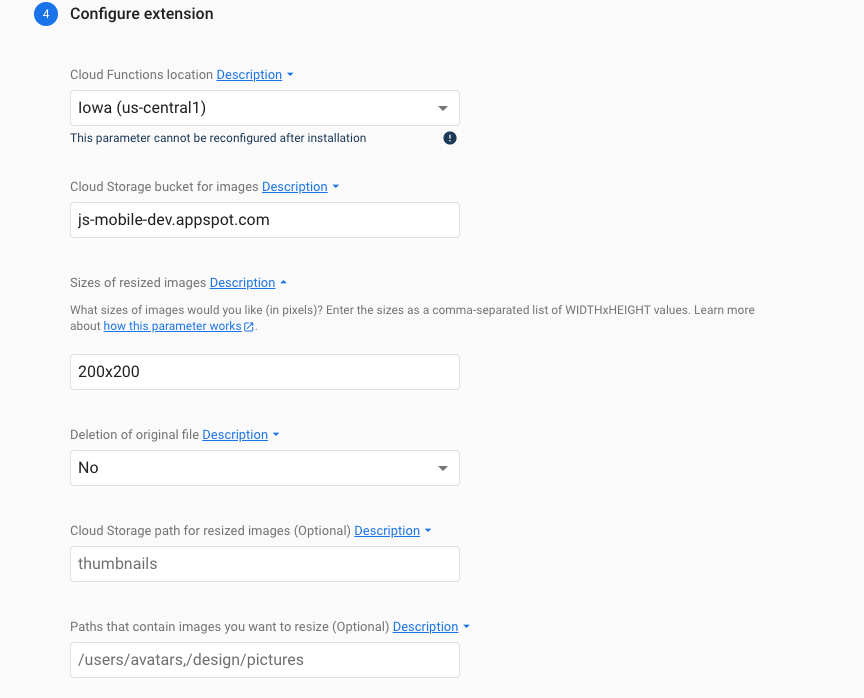
These are the available options:
- Location: the cloud function deployment location.
- The cloud storage bucket for the images.
- Sizes of the images, you can add the sizes as a comma separated list, for example: 200x200,300x300,450x450,550x550, it will generate the images on those sizes adding the size in front of the name, like 300x300-car.png.
- Deletetion of the original file lets you determine if you want to keep of delete the original uploaded image.
- Cloud Storage path for resizing images lets you determine a path inside the bucket for the new images. For example, if you’re creating 250x250 thumbnails for your images it can be something like thumbnails/ then it will create it like thumbnails/250x250-car.png
- Paths to listen will let you choose the paths for the images you’re uploading. For example, let’s say you only want to resize the images in 2 specific folders, you’d add those to that list as: files/images, files/pictures, then it will only resize the images in those 2 folders.
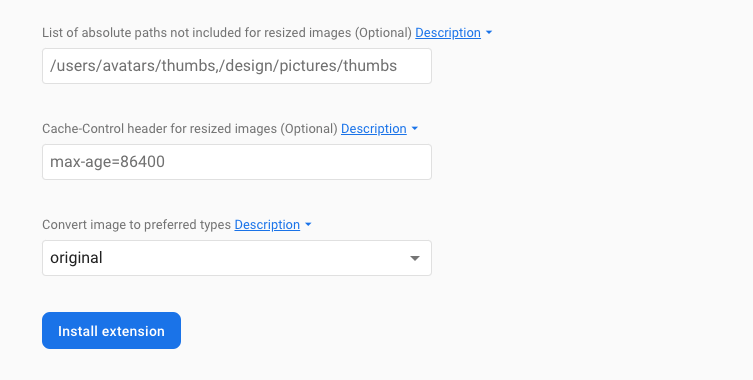
- Paths to ignore, paths that should never be resized.
- Convert images, it lets you set the type of the image, you can keep it as the original, or choose between png, jpeg, tiff, webp.
And that’s it, in the end you click Install Extension and it will take a few moments and then add the new Cloud Function in your project.